This is (Episode 8) of the #ETCGDadsTruck Series.
Link to (Episode 7 [Part 1] of this series): https://youtu.be/DgiUePQT8LU
Episode 9: https://www.youtube.com/watch?v=EtjetBW09R4
GMT400 Rear Disc Brake Conversion (Full/Extended Version): https://www.ericthecarguy.com/exclusive-videos/73-exclusive-videos/2352-gmt400-rear-disc-brake-conversion-full-extended-version-etcgdadstruck
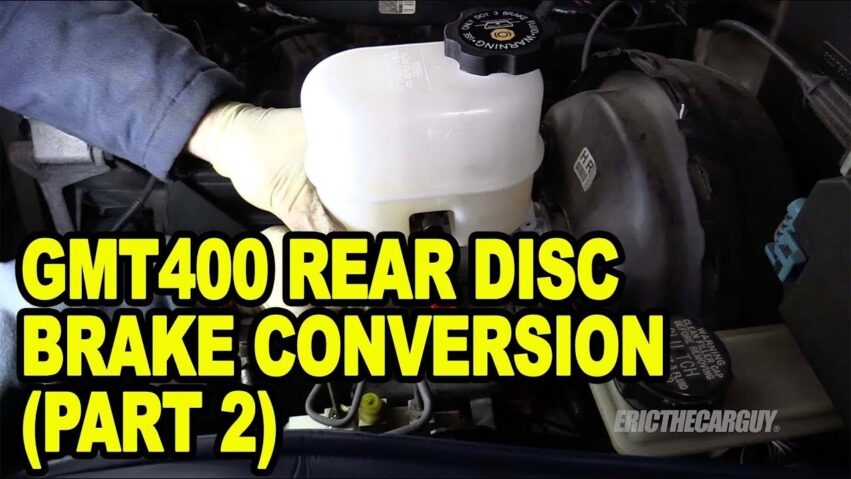
Here is (Part 2) and the conclusion of the rear disc brake conversion on my 1990 C1500 truck, which is a GMT400. GMT400’s ran from 1988-1998.
In this episode I cover the installation of the new “firm feel†master cylinder. I also show you how to perform an ABS Delete on one of these trucks. In addition, I cover the parking brake set up and how to deal with some of the issues that might come up.
Camera: Brian Kast, Eric Cook
My Patreon Account: https://www.patreon.com/EricTheCarGuy
The best place for answers to your automotive questions: http://www.ericthecarguy.com
Check out the ETCG Blog for the latest info: https://www.ericthecarguy.com/blog
Check out my ETCG1 channel: https://www.youtube.com/user/ETCG1?sub_confirmation=1
Summit Racing: https://www.summitracing.com
Smyth Automotive: http://smythautomotive.com
Thanks for watching!
Parts
SSBC Rear Disc Brake Conversion Kit: https://www.summitracing.com/parts/ssb-a126-2/overview/year/1990/make/chevrolet/model/c1500
Russell Steel Braided Brake Lines: https://www.summitracing.com/parts/rus-672340/overview/
RT Side Parking Brake Cable: https://www.1aauto.com/parking-brake-cable-passenger-side-rear/i/1abrc00070?f=762714&y=1990
L Side Parking Brake Cable: https://www.1aauto.com/parking-brake-cable-rear-driver-side/i/1abrc00074?f=762882&y=1990
Tools
Eastwood Line Flare Tool: https://www.eastwood.com/professional-brake-tubing-flaring-tool.html
Tubing Cutter: https://www.jbtoolsales.com/gearwrench-2107d-mini-tubing-cutter#oid=1002_1
Related Videos
How To Solve a Spongy Brake Pedal GMT400: https://www.youtube.com/watch?v=IcV6Rd4MiZ4&t=51s
How To Cut and Flare Brake Lines: https://www.youtube.com/watch?v=bqyoTWFZ5K4&t=20s
Rear Disc Brake Conversion (the hard way) Ford Fox Body: https://www.youtube.com/watch?v=uHFYrGEV3QQ
How To Fabricate Parking Brake Cables: https://www.youtube.com/watch?v=YeyaFW1CFPY&t=3s
How To Rebuild a Brake Caliper: https://www.youtube.com/watch?v=I4FzXGrSrmU&t=38s
The Basics of Disc Brake Service: https://www.youtube.com/watch?v=cKpmBvfVYZg
The Most Important Part of a Brake Job: https://www.youtube.com/watch?v=gl6TV_nQy3o
Introduction to #ETCGDadsTruck Build (Episode 1): https://youtu.be/kCepnacqRuI
#ETCGDadsTruck 4†Rear Suspension Drop (Part 1) (Episode 3): https://youtu.be/VNnEiIoGpwE
ETCG Gets a Truck: https://www.youtube.com/watch?v=5cblScHKnHc&t=12s
#ETCGDadsTruck Playlist: https://www.youtube.com/watch?v=kCepnacqRuI&list=PLSzhQ6St-ov1g_GML2aVq6EN-_ShJ9G2o
**Answers to your automotive questions found here: http://www.ericthecarguy.com/faq
Social Network Links
Facebook: https://www.facebook.com/EricTheCarGuy?fref=ts
Twitter: https://twitter.com/EricTheCarGuy
Google+: https://plus.google.com/100195180196698058780/posts
Instagram: http://instagram.com/ericthecarguy
Wanna see more stuff like this from ETCG? Information on Premium Membership: https://www.ericthecarguy.com/premium-content-streaming-etcg-content
Stay Dirty
ETCG
Due to factors beyond the control of EricTheCarGuy, it cannot guarantee against unauthorized modifications of this information, or improper use of this information.  EricTheCarGuy assumes no liability for property damage or injury incurred as a result of any of the information contained in this video. EricTheCarGuy recommends safe practices when working with power tools, automotive lifts, lifting tools, jack stands, electrical equipment, blunt instruments, chemicals, lubricants, or any other tools or equipment seen or implied in this video.  Due to factors beyond the control of EricTheCarGuy, no information contained in this video shall create any express or implied warranty or guarantee of any particular result. Any injury, damage or loss that may result from improper use of these tools, equipment, or the information contained in this video is the sole responsibility of the user and not EricTheCarGuy®.


Hi Eric! You are not fat, just big boned guy 🙂
Eric, I'm curious if you ever solved the spongy brake problem. Seems to be a common problem with the gmt400 series with vacuum boosters. I have a 98 gmc k2500 (sierra) with the same problem. I replaced just about every compoment (calipers, flex hoses, entire disc/drum components, etc.) imaginable minus the steel brake lines. I've also upgraded to different MC's (x4) last of which was a MC for the new body style. Breaking scares the hell out of me. I've bled and bled and bled to no avail. I've also bench bled the MC and also cracked the lines at the MC once installed…no difference. I have ABS and have also (manually) bled at the ABS module via other YT videos on how to do that. The only thing I haven't tried was having the dealer bleed the ABS module via a scanner, but I'm skeptical. People tell me, "Oh, well that's just how Chevy's are." I doubt it. I'm sure they didn't come off the assembly line like that. Let me know what you think.
Yo ni loco hubiera quitado el ABS.
How do the disc breaks hold up compared to the drums. Some people say don't install disc some people love them. What is your expertise on the subject. Great video….
I fell to see how you get all the air out of the rear given the fact that the bleeder is on the hose and not pushing through the caliper and pushing the air out, the fluid can simply go out the bleeder rather than into the caliper. I see why they did that but I would rather have the e cable under the bottom and the stock bleeder on top. Good vid, thanks.
Eric why did you put the fitting in the back and swap the lines? Every video I've seen about the NBS master has the fitting in the front and the lines are put back in as they came out. Please explain if u have some time. Thanks!
Does the kit come with any info as to what wheel size it fits? Can’t find anything on their website and I called to ask but they couldn’t tell me if it would fit an aftermarket 15†wheel
I did a abs bypass on my truck yesterday. My isolation valve was leaking out of a capped hole? It caused my abs light to flash 3x followed by a long blink. Luckily my fitting was the same size. I bought the edlemann 258450 adapter and it didn’t fit. My dumbass didn’t check if they were the same size and I went searching to adapt to my other fitting. Once I finally put the male end of the adapter to the fitting I realized how much time I wasted going store to store try to adapt to the same fitting 🤦ðŸÂ»â€Â♂ï¸Â. All I had to do was bend the line over and connect.
But you could have adapted it pretty easily. I had a terrible time getting that 1/4 fitting into the bottom of the proportioning valve with my abs in the way. I can’t imagine getting that brake line back into that tiny space on the frame there lol. I just bent it in the truck. Hopefully I didn’t break a line lol.
What's up with that Foxbody at 34:14? 🦊ðŸ¤Â
That starter sounds horrible. ,,,, Just like mine. Just put the original starter back in and it sounded like the one I took out. Good teeth on everything. No way to shim closer.
Sounds like it's Hydro Boost conversion time!
I have decided not to after seeing this. Good video though.
I like the diff cover, who makes it ??
I got what seem to be the same results, re stopping and pedal feel, with just that master cylinder upgrade.
I have a 97 chevuy and l Would like to get a Master cilinder for my Truck . Where did you buy it and How to ask for it . Hope you can Answerme Thanks
So it looks like the modification for the proportioning valve is just change it to a safety so if you lose a brake line it will close off fluid to that part of the circuit.
On the master cylinder which hole is the front brakes.
Your channel should be to ErictheCARGUY to the Comedic Mechanic! lol
Rear brake calipers are on wrong sides. Bleeder valves ALWAYS go on the top side. You have air trapped.
I have a 1997 c1500 that I replaced all the hardware, brake shoes and cylinders on the rear drum brakes then vacuum bleed all four corners and ended up going from a spongy brake pedal to a solid brake pedal.
excellent patience
OMG, after watching, think I will just live with the spongy brakes. Fun to watch, not sure it would be fun to do.
Do you have to delete the abs in order to get away with gutting that valve ?
i been building a 68 chevy thinking on putting disc breaks on it with a 2 inch drop spindles on the front
Funny guy!
Why not convert to hydro-boost??
Did you install a newer master cylinder?
Did you consider hydro boost brakes
ABS = Anti-Lock Brakes = Ability to Brake and Steer. This pulses the brake up to 120 times per second in a panic stop situation to allow the front wheels to rotate slightly and maintain the ability to steer. Removing ABS has no impact in the brake feel, but does increase your possibility of having an accident that you may have otherwise been able to avoid. Without ABS the tires lock up and you simply skid unavoidably.
Changing the brake pad material from organic, which gives a nice soft pedal, to a semi-metallic, or other material, to give a harder feel. On the other hand, a harder brake pad will wear the rotor down faster if it is a soft steel, designed for organic pads. You may need to go to a harder rotor to avoid excessive rotor wear.
Final thought… showing and promoting others how to disable a factory safety device could leave you open to legal recourse should a viewer get into an accident they may have been able to avoid, had the safety device remained in place. Just saying.
has that truck been really worked on to have rack and pinion steering?
Why did you swap the lines on the master cylinder? I've got the same master but have drums in the back. Brakes don't feel that great.
20:52 maybe i should have check the brakes first before we get into an accident lol
Gm had an issue with the diaphragm in some of their vacuum boosters failing. I didn’t have good breaks in my ‘88 K1500 till I put a newer model dual diaphragm booster on and master-cylinder from a 2500.
Great build, enjoyed all videos on the obs. Have a question. Instead of making bending and cutting lines, is there any flex or other brake line method I could buy or use. Thanks
Top quality video and content. I think your one of a handful of mechanics making how to car videos that actually wears gloves. Ps. Dont diminish your value and self worth by using self deprecating humor. You have intention and a clear path of your purpose. ✌ï¸Â
Easy way for better brakes sell Chevy > buy Ford done.
No adjusting of the actuating rod length?
very informative, AND had me laughing out loud. FANTASTIC VIDEO!
Did you ever figure out the little holes in the calipers was just big enough to hold the emergency brake spring? Not being a jerk those holes look like intended spring guides/holder. @30:51 you say it's just going to rub over the top of it. How about go through it.
Enjoy your videos a lot. I recently upgraded my 1995 Chevy Cheyenne to rear disc brakes using the Little Shop Manufacturing kit. I added a 2002 Tahoe master cylinder. My question has to do with the way you ran you brake lines to the MC. I have seen on a video from another manufacturer that showed using the brass fitting to place the existing front line to the rear and rear to the front. I did not do this thinking that the MC chamber sizes are equal vs. the different sizes on the "old" MC. I did not disable my abs. My brakes work well, but not as much of a change as I had hoped for. Do you feel reversing the 2 brake lines to the MC would/will make much of a difference and why? Thanks
Thanks for all the montage reminder of all the "fun" brake bleeds that my dad and I have done together. Also, parking brake cable is a $10 part, and probably needed to be replaced anyway. They stretch over time.
Definitely helped me decide not to do this conversion, thanks
A roll of Nickle Copper line would of saved you allot of cuss words man…